How to Erase a Hard Drive Securely Before Recycling

Wiping a hard drive clean is about more than just hitting "delete." To truly get rid of your data for good, you need a process called data sanitization, which permanently overwrites everything on the drive. The most straightforward methods use software to scramble the drive with random data, but for ultimate peace of mind, nothing beats physical destruction.
Why Simply Deleting Files Is Not Enough

It’s a dangerously common myth that formatting a drive or dragging files to the trash bin gets rid of them permanently. When you "delete" a file, you're not actually erasing it. Instead, the operating system just removes the signpost pointing to that data and marks the space as available to be written over later.
Think of it like ripping the table of contents out of a book. All the chapters are still there; they're just harder for the average person to find. But with data recovery software that's easy to get, someone with a little motivation can piece those "deleted" files right back together, exposing your most sensitive personal and financial details.
The Real Risks of Improper Disposal
If you don't properly wipe a hard drive before selling, donating, or recycling it, you're leaving behind a digital breadcrumb trail of your entire life. The consequences can be far more severe than a simple privacy invasion.
Here’s what’s at stake:
- Identity Theft: Cybercriminals can pull up old tax documents, bank statements, and personal IDs.
- Financial Fraud: Saved passwords, credit card numbers, and online banking logins become an open book.
- Data Breaches: For businesses, a single improperly discarded drive can spiral into a devastating breach, leading to hefty regulatory fines and a shattered reputation.
The difference between deleting a file and securely erasing it is huge, especially when it comes to recoverability. Let's break it down.
Data Deletion vs Data Erasure At a Glance
| Method | How It Works | Data Recoverability | Best For |
|---|---|---|---|
| Standard Deletion | The operating system removes the file pointer, marking the space as "available." | High. Easily recovered with basic software until the space is overwritten. | Clearing up space on your personal computer for non-sensitive files. |
| Formatting | Recreates the file system, which also just removes pointers. A "quick format" is highly recoverable. | Moderate to High. A full format is better, but data can still often be recovered. | Preparing a drive for reuse with a new operating system. |
| Secure Erasure | Software overwrites the entire drive with random patterns of 1s and 0s, multiple times. | Extremely Low to None. The original data is effectively destroyed and unrecoverable. | Preparing devices for resale, donation, or recycling where data security is critical. |
| Physical Destruction | The drive is physically shredded, crushed, or degaussed, rendering it inoperable. | Impossible. The storage platters themselves are destroyed. | End-of-life drives containing highly classified or sensitive information. |
As you can see, only secure erasure and physical destruction offer real protection against data recovery.
Understanding Data Sanitization
True data erasure—or data sanitization—is the deliberate, permanent, and irreversible removal of data from a storage device. It’s the only way to be sure that your information is gone for good.
Just as you need a plan for your physical hardware, it's also critical to have solid cloud data loss prevention strategies to protect the information you store online.
Before you get to the wiping stage, you have to handle the hardware itself. You can find detailed instructions in our guide on how to safely remove a hard drive from a computer before recycling. This is a vital first step to prepare your device for its next life, whether it's being repurposed or responsibly disposed of—turning your e-waste into hope for veterans and our environment.
Choosing the Right Software for Data Wiping
For most folks looking to erase a hard drive, software-based wiping is hands-down the most practical and secure way to go. These tools work by overwriting every single sector of your drive with patterns of random data. Think of it as burying your original information under layers and layers of digital noise, making it virtually impossible for anyone to dig up what was there before.
The real trick is picking a tool that fits what you're trying to do. Are you just wiping an old personal laptop, or do you need to prove compliance for your business? This is a bigger deal than ever with data protection laws getting stricter. For example, the market for data erasure in Europe blew up after GDPR was introduced. It's all part of a bigger shift toward secure software that lets us reuse drives instead of just shredding them, as noted in this deep dive into the data erasure market. This approach protects data and cuts down on e-waste.
Free vs. Paid Software Options
If you’re just cleaning up a personal drive, a free tool will almost certainly get the job done. They’re perfect for wiping an old machine before you donate or recycle it, giving you peace of mind that your data is gone for good.
Paid solutions, on the other hand, are built for the business world. Their killer feature is certified proof of erasure. This is an absolute must-have for any company that needs to comply with standards like HIPAA or SOX. These tools generate detailed, auditable reports that confirm every drive was wiped clean according to specific, recognized standards.
Here’s a quick breakdown to help you decide:
| Feature | Free Software (e.g., DBAN) | Paid Software (e.g., Blancco) |
|---|---|---|
| Cost | Completely free for personal use. | Requires a paid license, often per-wipe. |
| Primary Use Case | Individuals wiping personal drives. | Businesses needing certified, auditable erasure. |
| Verification | Basic on-screen confirmation of completion. | Generates a tamper-proof Certificate of Erasure. |
| Compliance | Meets basic standards but lacks official certification. | Certified to meet global standards (NIST, DoD, etc.). |
| Support | Community-based forums and online guides. | Dedicated customer and technical support. |
A Closer Look at Popular Tools
One of the most trusted names in the free category is DBAN (Darik's Boot and Nuke). It’s a powerful, standalone program that’s been the go-to for tech-savvy users for years. You just boot your computer from a USB drive loaded with DBAN, and it will erase every drive it can find.
Sure, the command-line interface in the screenshot looks a bit old-school and technical, but don't let it intimidate you. Once you pick the drive and the wiping method, the process is pretty much automated. Its strength is its simplicity—it does one thing, and it does it exceptionally well.
For businesses here in Atlanta that are focused on hitting corporate ESG goals, a paid service like Blancco is the way to go. It provides the heavy-duty documentation you need to prove your company handled its data responsibly, which is a huge part of corporate sustainability and CSR reporting.
When you're ready to get started, our guide offers more details on how to wipe a hard drive using these kinds of tools.
Key Takeaway: For your personal computer, a free tool like DBAN is more than enough. But for any business, especially one in a regulated field, investing in a paid tool that provides a Certificate of Erasure is non-negotiable. It’s the difference between knowing your data is gone and being able to prove it.
When Physical Destruction Is the Only Option
Sometimes, just wiping a hard drive with software doesn’t cut it. Maybe the drive is too old to even run the software, or it's been physically damaged. For situations involving extremely sensitive corporate data, the only way to be 100% certain that the information is gone forever is through physical destruction.
We're not talking about taking a hammer to it in your garage, either. This is about professional, irreversible obliteration. When the stakes are that high, you need a method that leaves absolutely zero chance of data recovery. Physical destruction ensures the drive's platters—the spinning disks where your data actually lives—are rendered completely unreadable. It's the ultimate guarantee.
Professional Destruction Methods
When you turn to the pros, they have certified methods to make sure a hard drive is permanently destroyed. These techniques are all about targeting the physical storage medium to ensure the data can never be pieced back together.
Two methods have really become the industry standard:
- Degaussing: This process zaps the hard drive with an incredibly powerful magnetic field. That force instantly scrambles and newtralizes the magnetic bits on the platters, effectively erasing everything. It's a quick, clean, and silent way to sanitize magnetic media.
- Shredding: Think of it like a paper shredder, but for solid steel. Industrial hard drive shredders use immense force to cut, grind, and tear drives into tiny, mangled fragments. This process doesn't just damage the platters; it demolishes the electronics and casing, too. Reconstruction is flat-out impossible.
Why DIY Destruction Is a Bad Idea
Sure, smashing a hard drive with a hammer might feel satisfying, but it's a surprisingly ineffective—and dangerous—way to go. The platters inside are incredibly durable and can often survive blunt force with recoverable fragments of data still intact. Even drilling holes can easily miss the critical sectors where sensitive information is stored.
Expert Tip: Never try to burn or dismantle a hard drive on your own. The internal parts contain toxic materials that release hazardous fumes when burned, and the platters can shatter into dangerously sharp shards. Always leave physical destruction to certified professionals.
For businesses, especially those in Atlanta handling regulated data in healthcare or finance, professional destruction isn't just a good idea—it's often a compliance requirement. The demand for these services is climbing as companies get more serious about managing risk. In fact, the global market for hard drive destruction is projected to nearly triple, jumping from $1.65 billion in 2024 to $5.05 billion by 2035, according to recent industry forecasts. You can explore more about this growing market's statistics and key players to see just how critical this is becoming.
When you use a professional service, you get a Certificate of Destruction. This is a legal document that serves as your official proof that your data was destroyed in compliance with privacy laws like HIPAA or FACTA. For any organization, this certificate is crucial for audits and proves you’ve done your due diligence. At GreenAtlanta.com, we provide secure hard drive shredding services that include this vital documentation, turning your e-waste into verifiable security and support for veterans and reforestation.
Your Guide to Using Erasure Software
Alright, you're ready to wipe a drive clean. Let's walk through how to do it with erasure software. The process itself isn't terribly complicated, but you absolutely have to be careful. One wrong click could mean wiping the wrong device, and that's a mistake you can't undo.
The whole thing boils down to a few key stages: backing up your files, creating a special bootable USB, and then letting the software do its magic. This visual gives you a quick look at the workflow, from saving your data to the final, irreversible wipe.
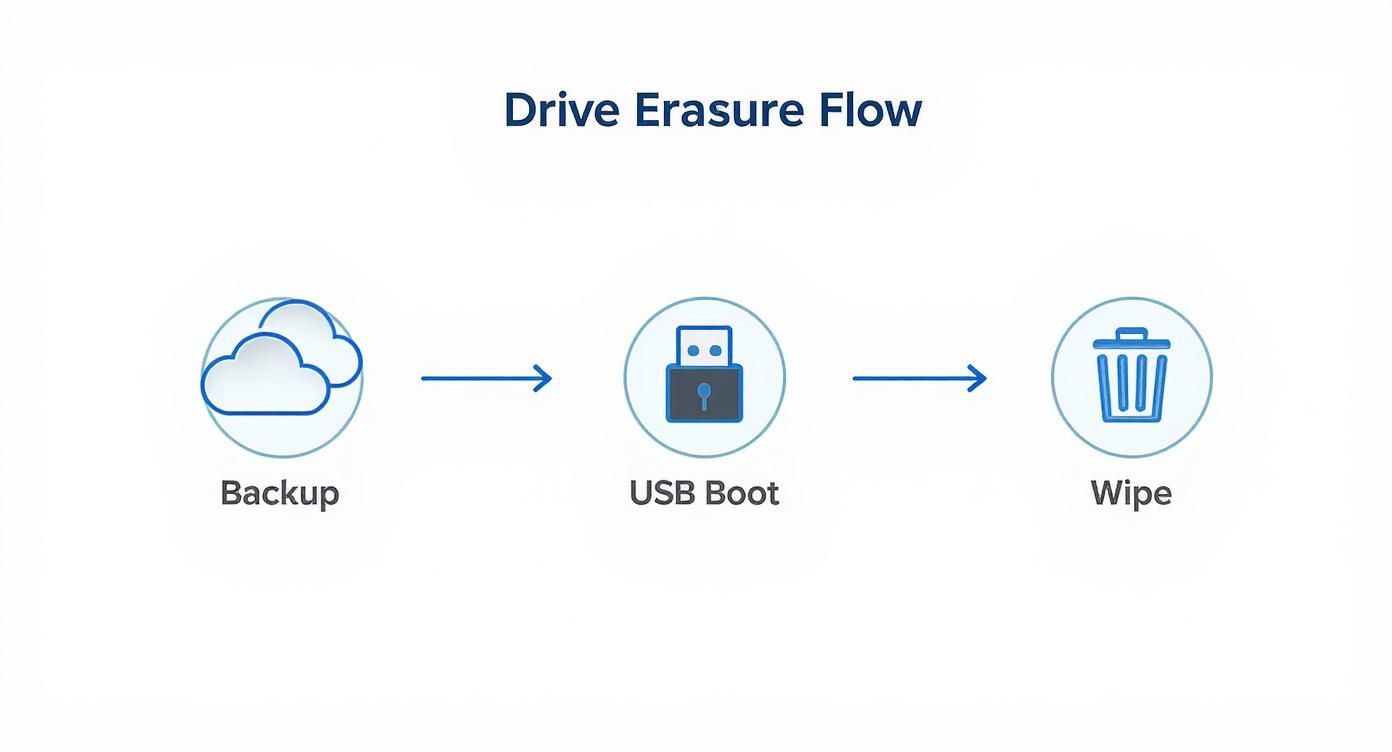
This methodical approach is non-negotiable. First, you secure your data. Then, you prepare your tool. Only after those two steps are complete should you even think about starting the erasure.
Prepare for the Wipe
Before you touch any erasure software, you must back up every single file you want to keep. I can't stress this enough: once the process begins, there is no going back. Your files will be gone for good, completely unrecoverable.
Use a cloud service or a separate external hard drive to save your documents, photos, and anything else you can't live without. Once you think you're done, double-check that the backup is complete and that you can actually access the files before you move on.
Creating Your Bootable Drive
Next up, you'll need to get the erasure software onto a bootable USB drive. This lets you run the program without loading your computer's operating system, which is the only way to wipe the main system drive.
Here’s the game plan:
- Download the Erasure Software: Grab a reputable tool (like the DBAN tool we mentioned earlier) and download its ISO file. Think of an ISO as a digital blueprint of a CD or DVD.
- Get a USB Creation Tool: You'll need a second piece of software to "burn" that ISO file onto your USB stick. Tools like Rufus or balenaEtcher are perfect for this, and they're both free and simple to use.
- Create the Drive: Pop in a blank USB drive, fire up the creation tool, point it to the ISO file you just downloaded, select your USB as the destination, and hit start. The tool will format the USB and make it bootable.
With that, your simple flash drive just became a powerful tool for securely wiping a hard drive.
Booting from Your USB Drive
With your bootable USB in hand, it's time to tell your computer to start from it instead of its own hard drive. You do this by changing the boot order in the computer’s BIOS or UEFI menu.
Restart your computer and start tapping the key to enter the setup menu—it's usually F2, F12, Delete, or Esc. The exact key depends on the manufacturer, so just watch the screen for a prompt when it first powers on. Once you're in the menu, navigate to the "Boot" or "Boot Order" section and set your USB drive as the first device. Save your changes and exit, and your computer will now boot directly into the erasure software.
Critical Warning: Pay close attention to this next part. You have to read everything on the screen to correctly identify the hard drive you plan to wipe. It is incredibly easy to accidentally select the wrong drive—like an external backup drive you forgot to unplug—and permanently erase it.
Starting the Erasure Process
Once the software loads, it will show you a list of all the storage drives it can see. Each drive should be listed with its size, model name, and serial number. Take your time here. Be absolutely positive you've selected the correct one.
After confirming your choice, you can pick a wiping method. Most free tools offer a few options, from a "quick erase" (a single pass of zeros) to more secure, multi-pass standards like the DoD 5220.22-M. Honestly, for most personal uses, a single pass is more than enough.
Once you kick off the process, just let it run. The time it takes can vary wildly, from a few hours to more than a day. It all depends on the drive's size and speed, plus the wiping method you chose. When it's finished, the hard drive will be completely sanitized and ready for its next life—whether that means being reused, sold, or responsibly recycled with a service like GreenAtlanta.com, turning e-waste into hope.
How To Securely Erase Solid State Drives
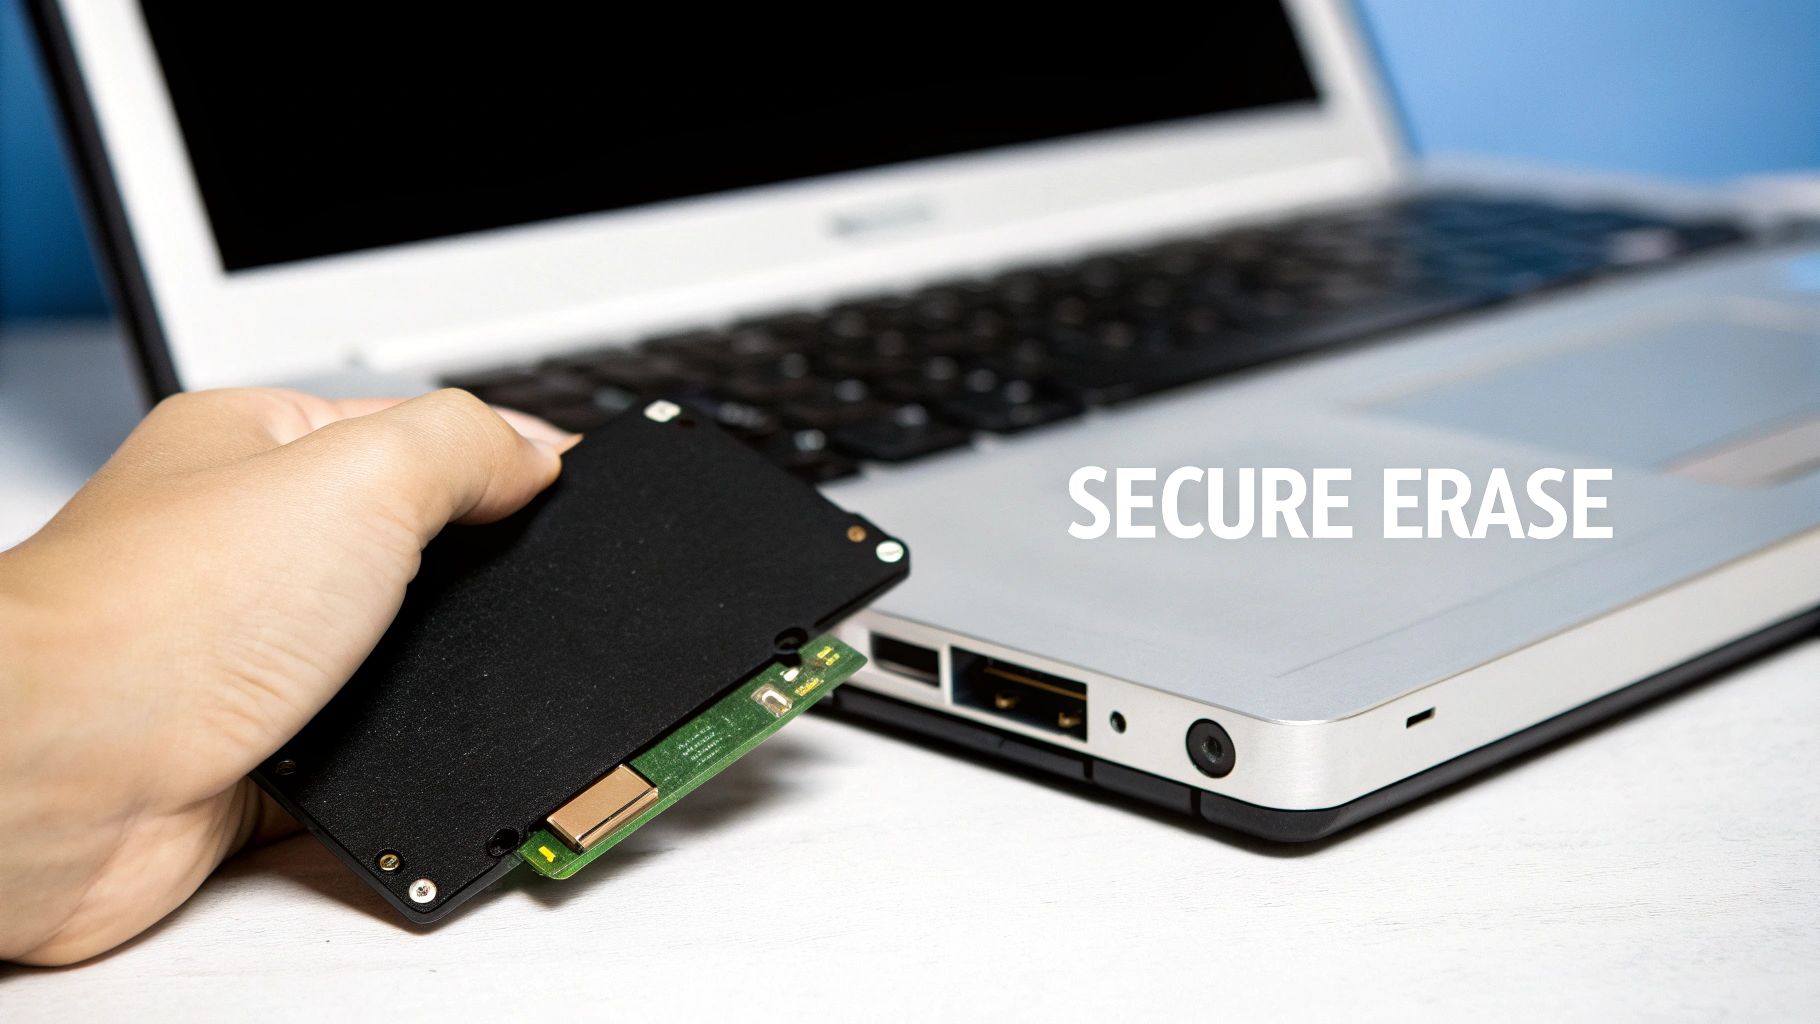
If you're getting ready to recycle an old computer, you have to know that erasing a Solid State Drive (SSD) is a completely different ballgame than wiping a classic Hard Disk Drive (HDD). You can't just run standard overwriting software and call it a day. In fact, doing so is not just ineffective—it can actually damage the drive.
This all comes down to a process called wear-leveling. It’s a clever feature where the SSD’s controller intentionally spreads out data writes across all its memory cells. While this is great for extending the drive’s lifespan, it’s a nightmare for traditional wiping tools. That software might think it's overwriting your sensitive files, but the wear-leveling controller could be redirecting those writes elsewhere, leaving recoverable fragments of your original data behind.
The Right Way To Wipe An SSD
So, what's the solution? The gold standard for wiping an SSD is a built-in firmware command called ATA Secure Erase.
Think of it as the ultimate factory reset, designed by the manufacturer to purge every single memory cell simultaneously. It tells the drive's own controller to reset all stored electrons to a "zero" state, making data recovery virtually impossible. It’s the most effective method because it works with the drive's firmware, not against it.
Key Insight: ATA Secure Erase is the manufacturer-approved method for returning an SSD to its original, out-of-the-box performance state, completely free of any user data.
How To Use ATA Secure Erase
Don't let the technical name intimidate you; accessing this command is usually pretty straightforward. Most drive manufacturers provide free utility software to get the job done.
Here’s where to look:
- Manufacturer Software: Tools like Samsung Magician or Crucial Storage Executive have user-friendly interfaces that let you initiate the Secure Erase command with just a few clicks.
- BIOS/UEFI: Some motherboards let you run the command directly from the computer's BIOS or UEFI setup menu. This is a great option if you can't install the manufacturer's software for some reason.
We cover this process in more detail in our comprehensive guide on how to clear a laptop hard drive, which walks you through the steps for both SSDs and traditional HDDs.
Using the right tools is about more than just security—it's also about preserving the health and value of the drive. It’s the smart way to handle modern storage before turning that old tech into new hope.
HDD vs SSD Erasure Methods
Erasing an HDD and an SSD requires fundamentally different approaches due to their underlying technology. HDDs store data on magnetic platters, while SSDs use flash memory cells. Here’s a quick breakdown of the best methods for each.
| Drive Type | Recommended Erasure Method | Why It's Different | Tools to Use |
|---|---|---|---|
| HDD (Hard Disk Drive) | Data Overwriting (Multi-pass) | Data is physically written onto magnetic platters. Overwriting these platters multiple times effectively destroys the data. | DBAN (Darik's Boot and Nuke), KillDisk, built-in OS utilities (diskpart) |
| SSD (Solid State Drive) | ATA Secure Erase | Uses flash memory with wear-leveling. Secure Erase commands the drive's controller to reset all memory cells at once. | Manufacturer software (e.g., Samsung Magician), Parted Magic, some BIOS/UEFI |
Ultimately, choosing the correct method ensures your data is gone for good without causing unnecessary damage to the hardware. For HDDs, overwrite. For SSDs, always go with Secure Erase.
Recycle Your Drive and Make an Impact
Once you’ve erased a hard drive, what happens to the physical hardware? Instead of letting it gather dust in a closet, you can give it a new purpose through responsible recycling. This is where your securely wiped drive can make a real-world difference, turning old technology into a force for good.
Companies like GreenAtlanta.com have built programs that transform e-waste into tangible community support. Through "Recycle for a Cause" campaigns, your old tech can directly fund initiatives that assist veterans and plant trees in our national forests. It’s a simple act of disposal that creates a dual impact.
Turning E-Waste Into Hope
For businesses here in Atlanta, this model offers a clear and simple path to meeting Environmental, Social, and Governance (ESG) goals. When you partner with a certified recycler, you can get detailed Veteran Support Impact Reports and Plant-A-Tree certificates to include in your CSR documentation. It's a straightforward win that proves a genuine commitment to corporate responsibility.
Your old tech can house a veteran and grow a forest. This simple message highlights the powerful connection between responsible electronics recycling and tangible social outcomes.
The process is just as easy for individuals. After preparing your computer for recycling, you can find a local drop-off or pickup service that operates with transparency. Many services even provide personalized impact certificates, showing you exactly how many trees you helped plant or veterans you supported. This turns a routine task into a truly rewarding experience.
From Your Hard Drive to a Greener Planet
Choosing the right partner is critical to ensure your device doesn't end up in a landfill. Certified e-waste recyclers follow strict environmental standards, breaking down components for reuse and safely handling any hazardous materials. This end-of-life management is absolutely essential for sustainability.
After securely wiping your drive, you might want to dispose of the entire device. If so, it’s worth looking into how to recycle your laptop for cash. Whether you're looking for a little compensation or a charitable outlet, the most important thing is ensuring your hardware is handled properly after the data is gone. That closes the loop on a secure and impactful disposal process.
Common Questions About Wiping Hard Drives
When it comes to destroying data for good, a lot of questions pop up. That’s perfectly normal. Getting straight answers is the best way to feel confident before you hit that final erase button. Let's dig into some of the most common ones we hear from our clients.
How Can I Be Sure the Data Is Truly Gone?
This is the big one, isn't it? It’s the question that keeps IT managers up at night. The gold standard for proof is a verification report issued by certified data erasure software. Once the wipe is complete, this certificate confirms the process was a 100% success across every single sector of the drive.
For the highest level of assurance—the kind that satisfies auditors and regulatory bodies—you'll want software that meets stringent standards like DoD 5220.22-M or NIST 800-88. These protocols don't just delete files; they perform multiple overwriting passes with random characters, making data recovery virtually impossible, even with sophisticated forensic tools.
Can I Erase a Hard Drive Without Removing It?
Yes, but there’s a catch. You can easily wipe any secondary drive (like a D: or E: drive) while your computer is running.
However, erasing your main C: drive—the one with your operating system—is a different ballgame. You have to boot your computer from a separate device, typically a USB flash drive loaded with the erasure software. An operating system simply can’t wipe the drive it's currently running on. It’s like trying to saw off the branch you’re sitting on.
What Should I Do with the Drive After It Is Wiped?
Once a drive has been securely wiped, it’s completely safe to be reused, sold, or donated. For those devices at the end of their lifecycle, responsible e-waste recycling is absolutely the best path forward.
Services like GreenAtlanta.com don't just recycle your tech—they give it purpose. Our "Recycling That Restores Lives and Landscapes" approach turns old hardware into a positive force, supporting causes like veteran aid and reforestation while keeping hazardous materials out of our landfills.
It’s the final, crucial step in a secure and socially conscious IT asset disposition plan. Your old tech gets a new life, and you get the peace of mind knowing your data is gone forever while making a real difference.
Ready to recycle your old IT equipment securely and responsibly? At Atlanta Green Recycling, we turn your e-waste into hope. We offer certified data destruction and cause-based recycling to help your business meet its ESG goals while supporting veterans and our planet. Schedule your free pickup for 50+ devices and receive a Veteran Support Impact Report and Plant-A-Tree certificate. Visit us at https://www.greenatlanta.com to learn more.